So, you’ve just bought a brand new DrayTek router, and you’re ready to incorporate it into your network - but where do you begin?
One of the great things about DrayTek routers is that they strike the balance between being user-friendly and extremely versatile, with a huge range of customisable features and options. Depending on your router, you could have policy-based routing, hotspot web portals, Quality of Service (QoS), VoIP encryption and VPN tunnels at your fingertips from the get-go.
However, even the most forgiving and easily manageable routers like DrayTek’s portfolio can sometimes seem daunting if you’re not sure where to begin; so whether you're looking for a beginner's guide to setting up your brand-new DrayTek or a seasoned professional looking for router optimisation tips, we at NetXL are here to help!
What is a router, and why is it important?
Before we get into the setup, it’s a good idea to take a look at what a router does, and the position it occupies in a standard network; this will then help us have a clearer picture of what we’re configuring the router to do once we begin setting the router up.
A router connects your computer and other devices to the internet, either through an Ethernet cable or wirelessly via WiFi; as the name suggests, it ‘routes’ traffic from your ISP (‘Internet Service Provider’, for example BT or Sky) to the correct devices in your home or office. Your ISP’s network connection enters the building via a Modem, which then passes that connection onto your router, which in turn distributes it to each device sending and receiving information over the internet; if there are multiple devices all connecting to one internet network, a router makes sure that all that traffic goes to the right places. In some cases, your modem and router are two different devices; however, some routers will have a modem built-in and won’t need a separate device.

DrayTek routers are both powerful and adaptable, with options for any deployment from home offices to Enterprise-level, high-demand networks. Depending on how sophisticated your network needs to be, your DrayTek router may be involved in many different things - not only routing traffic correctly to your devices but also keeping your network secure and protected against bad actors, managing separate networks for guests, handling your phone lines if you’ve got a VoIP system, and a huge number of other functions. It’s crucial that you choose the right router for your needs, and that it’s set up correctly.
How do I start setting my router up?
Firstly, you’ll need to plug the router in!
For power, you’ll need to plug the router into a wall socket using the included power cable, and for its internet connection, you’ll need to use an Ethernet cable to connect your router’s WAN port to your ISP. Depending on the type of network setup you have, this could either be a port in your wall, or your modem’s output port. Once it’s all connected, power on the router using the switch at the back; you can tell if it’s correctly powered on as the LEDs at the front of the unit will light up.
Next, take a look at the user guide in the box of the router itself; this should give you the router’s IP address, which is a unique number that identifies it in your network. The default IP address for most routers is 192.168.1.1, although it’s worth double-checking in the start-up guide!
Using another Ethernet cable, connect a PC or laptop to one of the router’s LAN ports, and type your router’s IP address into the search bar of your preferred internet browser. You’ll then be taken to a login screen prompting you for a username password; the default username and password should be ‘admin’ and ‘admin’ without quote marks.
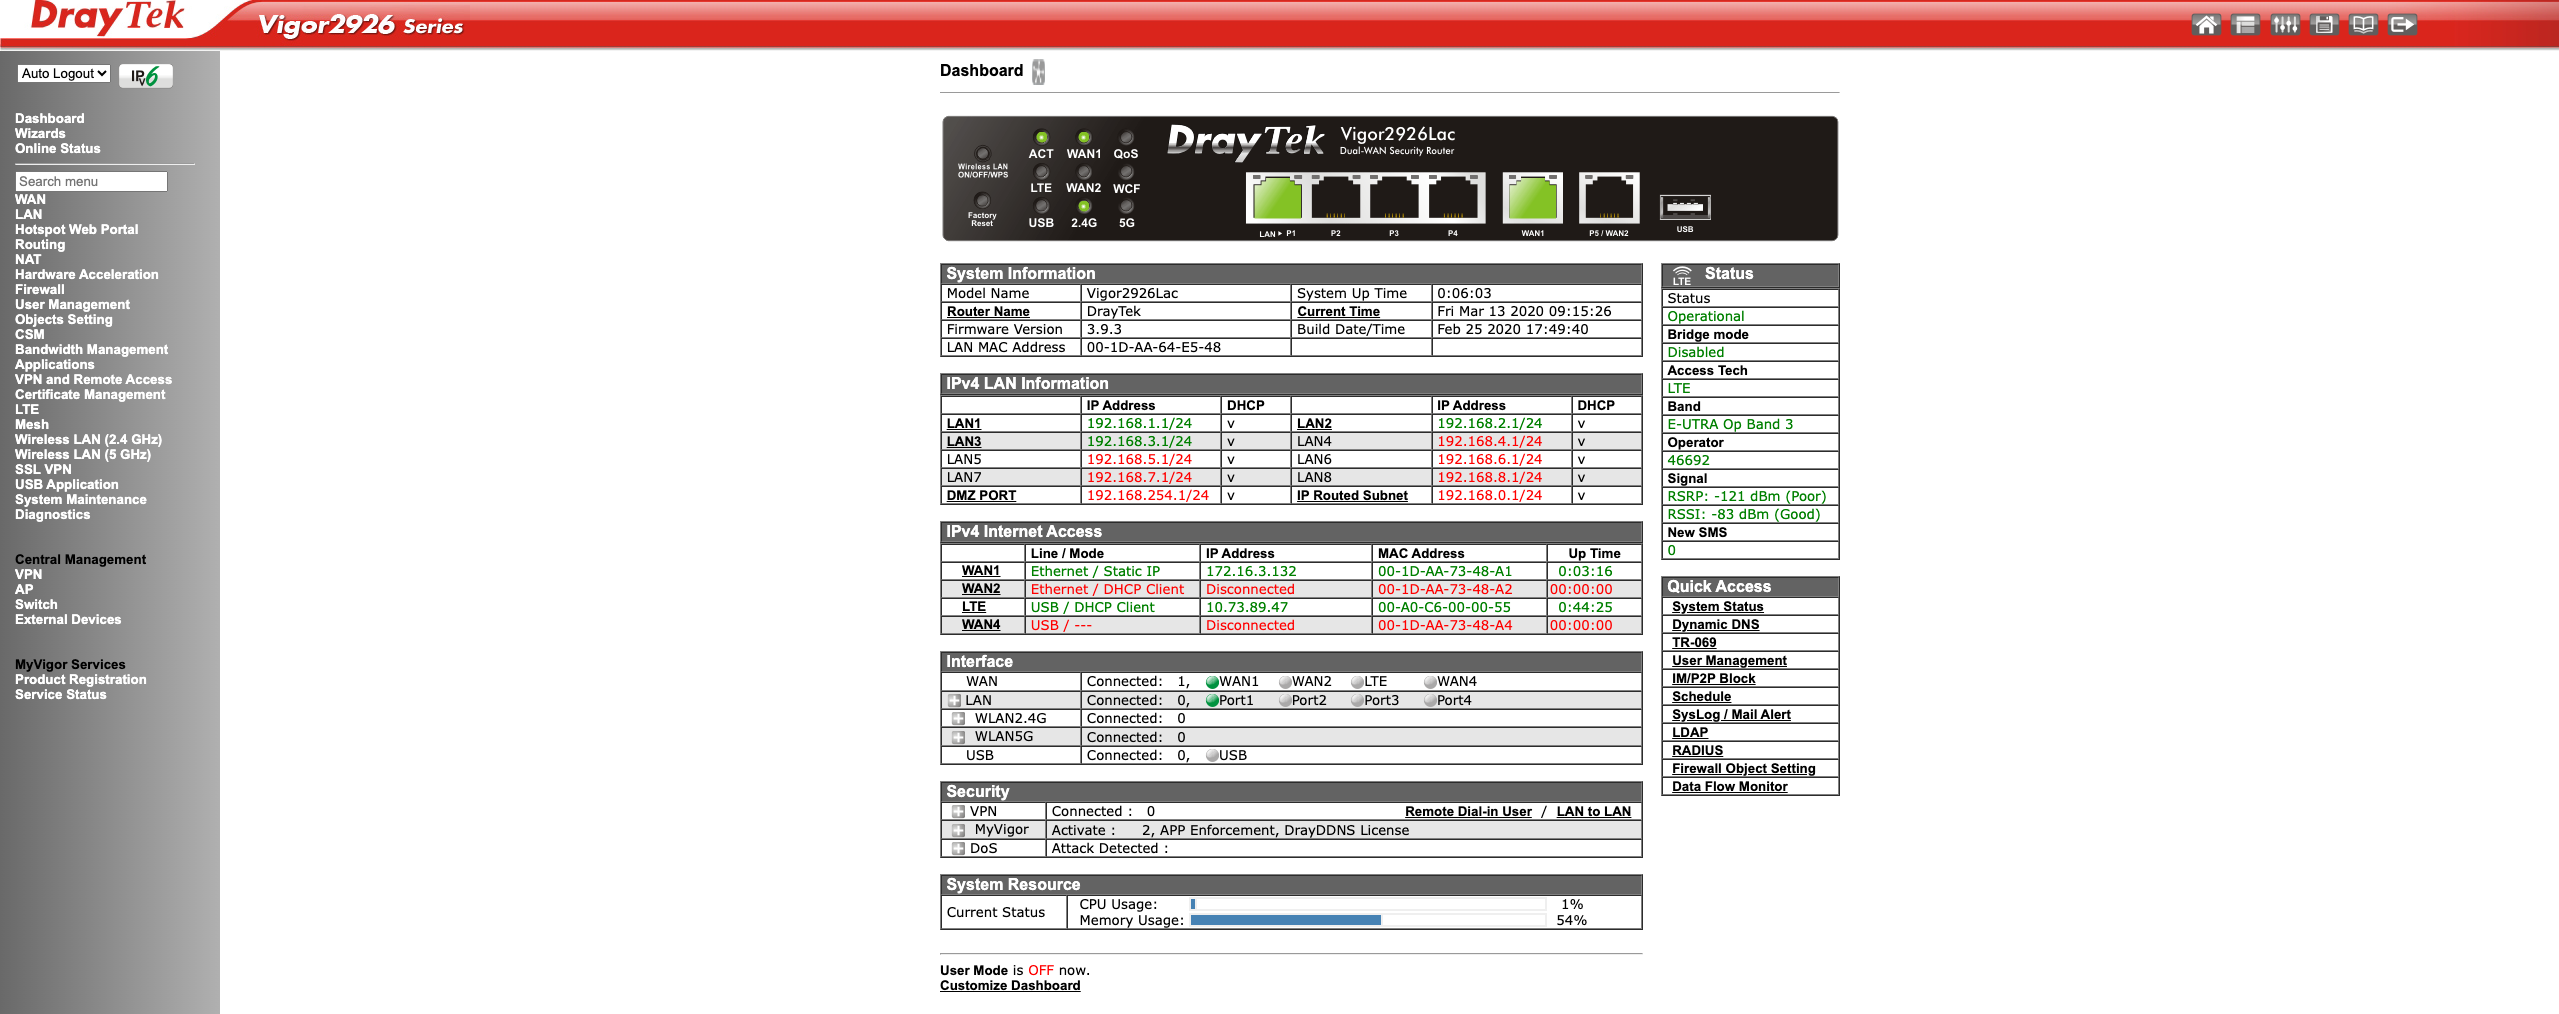
You should now be in the interface! This is a real-time interface for the DrayTek router, and you should be able to see a live report of the router itself - for example, any illuminated LEDs on the front, any active ports and so on. As a first action, it’s a good idea to change the username and password from admin to something more secure - this should be under System Maintenance > Administrator Password in the menu on the left. It’s also good practice to check for any firmware updates, which you can find under System Maintenance > Firmware Upgrade.
Once you’ve changed your password, it’s time to set up your first network!
How do I connect my router to my ISP?
First of all, we’ll need to tell the router how to communicate with your ISP. DrayTek routers have a wizard that can guide you through the setup process of your first network; you can access this by clicking on Wizards > Quick Start Wizard in the very top left.
The first screen is setting a password for your network; once it’s set, click Next to move onto the next screen.

On the next screen, you’ll need to specify which WAN port you’re using, and the display name of the router itself. The display name can be anything you’d like and only serves as an easy way to identify the router, but which WAN port you should choose depends on the router you have, and the network you’re setting up; for example, on a router with WiFi, 5G and Wired connectivity options, you’d need to choose WAN1 or WAN2 for a wired network, WAN3 or WAN4 for a WiFi connection and so on.
If in doubt, your included user manual should give you a clearer indication of what you need to do for your specific router!
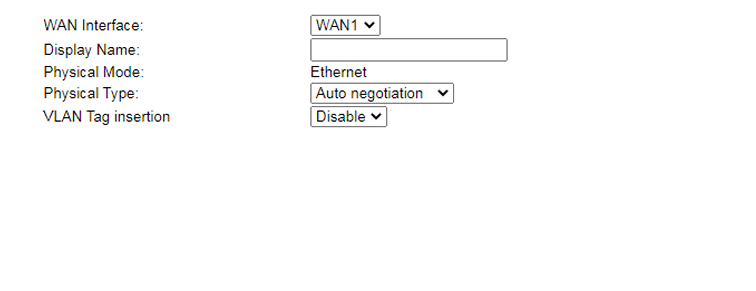
Once you’ve chosen your WAN, click next once again.
You’ll now see a drop-down menu with a few different options of internet access type (PPPoE, PPTP, L2TP, Static IP or DHCP). You don’t need to know specifically what these all mean, just which one you have - you should be able to get this information from your ISP if you’re not sure.
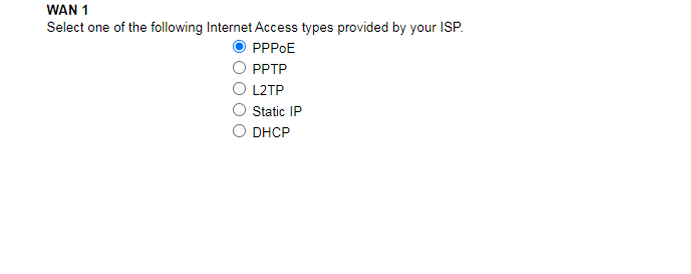
We’ll look at the two most common types of internet access here, PPPoE and DHCP - however, once again, if you have a different kind of network, take a look at your installation manual for your router for more information!
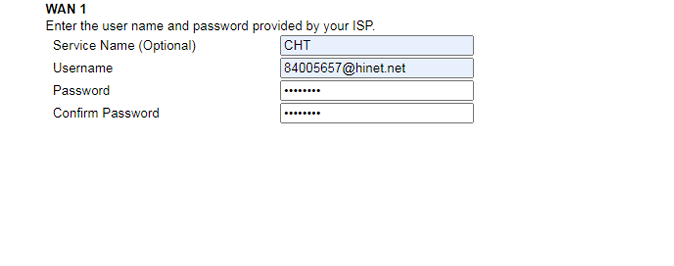
PPPoE
If you have a PPPoE connection, select PPPoE, and click next. On the next screen, you’ll be prompted to add your username and password from your ISP - this will link your router to your service provider. Then, just review your details, and click finish! You should now be connected to your ISP over PPPoE.
 DHCP
DHCP
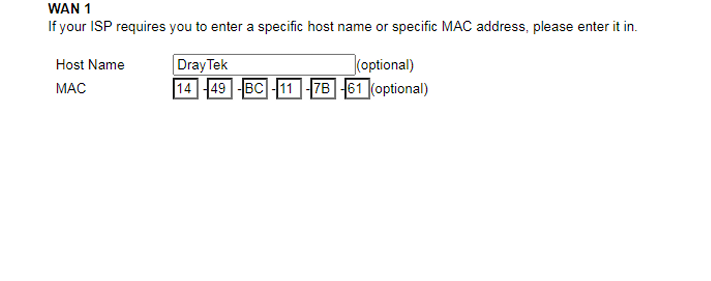
If you have a DHCP connection, select DHCP and click next. You’ll then be prompted to add your host name and/or MAC address of the router if your ISP requires it - you should be able to find the MAC address of your router on the bottom of the unit. Then, just click next, review your details, and click finish - all done!
How do I set up my WiFi network?
If you have a router that supports wireless connectivity, you’ll also need to set up a WiFi network - luckily, once you’ve connected your router to your ISP, this is straightforward!
In order to make a wireless connection available, navigate on the menu on the left to Wireless LAN > General Setup. If your router is multi-band (meaning it can provide WiFi connection on multiple frequencies at once), and you want to use all bands at once for the best and fastest possible WiFi connection, you’ll need to set up both bands in turn: for example, on the 2.4GHz and 5GHz bands.

First, make sure that the ‘Enable Wireless LAN’ box in the top left is ticked. If you need to, you can also change the Mode (the type of WiFi it’s providing) and the Channel (the specific MHz frequency for the WiFi), but in general you shouldn’t need to. They’re important troubleshooting options in case you run into issues however, so don’t forget about them entirely!
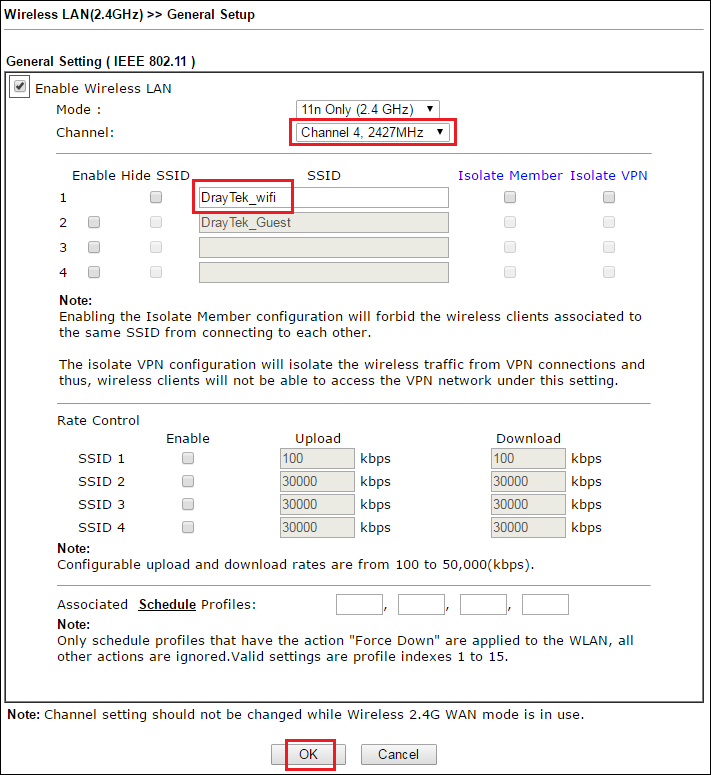
You’ll see the options to ‘enable / hide SSID’ - this stands for Service Set Identifier, and it’s just another name for a WiFi network. Set your SSID name (this is what will appear in a device’s list of WiFi networks), and click OK. Your WiFi network should now be set up!
If you’d like to create a WiFi password, you set it in the Security interface just under the General Setup tab where we’ve been configuring the WiFi network itself, and enter your password in the box labelled Pre-Shared Key (PSK). This is your WiFi password, and you’ll need it to connect to your WiFi in future.
If you’d like to set up multiple SSIDs - for example, for a guest network - you can simply follow these same steps on the other SSID boxes, and set separate passwords for each.
So what's next?
We’ve reached the end of this initial setup guide, having plugged your router in, connected it to your ISP, and set up networks for both wired and wireless connections; however DrayTek’s portfolio of routers are jam-packed with features ranging from centralised Access Point Management, to VPN integration, to VoIP support, to firewalls.
The features you’ll need to set up will depend entirely on your network requirements and the type of router you’ve purchased - for more guidance on which DrayTek router is perfect for your needs, take a look at our DrayTek Router Buying Guide!
Any DrayTek router you purchase will include a detailed User Manual, setting out exactly how to configure your router; however, for any further questions or are looking for more advanced features, reach out to our friendly support team!
